It’s All Timing
Picture this for me and then file it in the “Glamorous Life of a Professional Photographer” file. Right now, I am flying back from Colorado where I was intending to photograph wildflowers and enjoy the Rockies but where I instead lost 7 pounds in 6 days due to a dreadful stomach flu. But the hideousness of that experience is nothing compared to the one I now find myself in. I am, for the next two hours, stuck in the middle of air passenger Hell. I find myself surrounded by misbehaving toddlers. I am in row 13, seat C a perfectly nice isle seat. To my left is a 2-year old little monster-girl in 13B. Her mother, with an infant apparently surgically attached to her left breast, is in 13A. The Devil child is currently kicking the seat table with her little monster-girl feet and pounding her little monster-girl head into my left arm. A moment before she was including me in her make believe puppet games with the air sickness bag. I am not an unfriendly guy but when I am on a plane I just want to be left alone. I also am at a bit of a loss as to what to do when Barfy, the bag puppet, comes a calling. In seat 12D there is a wrinkled little salamander (a new born) who can’t be much older than last night’s sports section which I am so desperately trying to read. She is, actually, doing just fine, sleeping the flight away. But she is attracting the attention of every passing grandmother on the flight. This is also fine except each one insists on bending over to get a better look at the little newt. This, of course, places an old and at least so far, ample derriere precisely in my face. I am becoming more keenly aware of the fragrances of the elderly than I really need to be. “So how was your flight to Chicago?” “Depends.” In seat 13D is a cute little boy about 3 years old who just threw up. I suspect he will do it again. Need I say more? In seat 14D is another curly haired little monster-girl in little ducky diapers. They are just not regular little ducky diapers though, they are poopie little ducky diapers. I know this because she has been telling everyone between rows 9 and 16 for the last five minutes and because……well, let’s just say it is very obvious she is telling the truth. Apparently, her parents are suffering both hearing and olfactory loss. This was just the first 15 minutes of the flight. It went on for two hours, two whole hours. So the next time you fantasize about being a professional photographer and think how wonderful it would be to travel all the time remember my time in the Terrible Toddler Triangle. Excuse me, I’ve got to get up. A spontaneous group breast-fest has broken out and I am suddenly very thirsty. You are probably wondering why I bring this up in a photography column. Well, it is all about timing. I could’ve caught an earlier flight but instead I chose this one. I am beginning to realize that timing is every thing in photography as well. Not everyday is created equal. You can do all that you want, pull out every trick in your bag but if the timing isn’t correct you lose. In every season there are only a few days when every thing is perfect, when everything is just as you wish it to be. Sometimes it is not even a few days. Some seasons all you get is an afternoon or the first few hours of a morning. The rest of the time there is always something not quite right. The wind is blowing, the light is too harsh, your mind is elsewhere, your body is elsewhere, whatever, there is always something wrong. You get a very limited time when things are perfect. Flowers are not in full bloom forever, they begin to deteriorate almost immediately. Greens leaves are not always bright and glossy, insects attack them and begin to look ragged quite quickly. The sun is not always in the right location, animals do not always look good and fog is not always so thick and still and perfect. You know this is true. You know it when you are not photographing and one of those perfect times come rolling along and there is nothing you can do about it. You will tell yourself that tomorrow will be just as good or that the next time you come back will perfect too but you know better. A perfect time comes only so rarely that if you don’t take advantage of it right away you will just have to wait until one rolls along again. That can be a long wait. I missed the lady slippers this year because I thought that I would get another time or two when they were in bloom to photograph them. I was wrong. I am going to have to wait until next June. We had two crisp, clear days in June that were perfect for landscapes. All the other June days had hazy white horizons that look terrible on film. I was busy for each of those days. Each of the following days when I was ready weren’t nearly as good. I put my photograph off and I paid the price. We had one perfect day in June when there was a heavy dew, no wind and beautiful diffused light. The flowers I wanted to photograph were fresh and looking great. This all lasted one morning, but I was busy. The next time I got up to the flowers the light wasn’t so good, there was no dew and the flowers were not in perfect condition. I could’ve taken some pictures and I might have been able to create a nice shot but it wouldn’t have been as good as the shot I
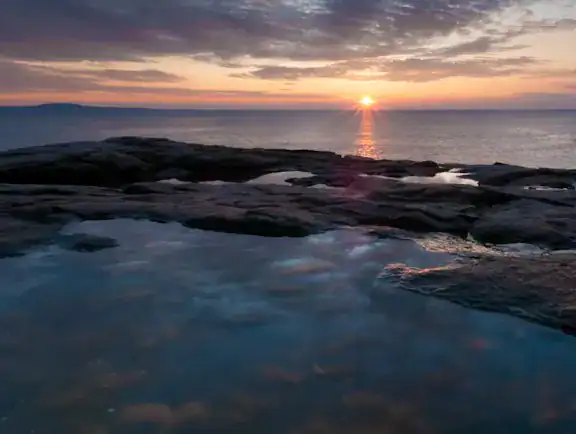
Chasing Vermont Landscapes
It’s July, I’m home in Vermont and I am desperate for landscapes. This seems a bit silly, after all, how desperate can a fella be for a landscape shot. All you have to do is go out and find a big attractive lump -mountain, barn, lighthouse – in the background and then find a big attractive lump – flowers, stream, rock – in the foreground, jam them all together and, viola, a winning landscape photograph. Here’s the catch: When you are living east of the Mississippi there is always something in between your two lumps. Usually, it is called the forest. Either those darned trees block the lump in back or in order to see the lump in back you have to get so high the lump in front is lost. This phenomenon is the derivation of the saying “You can’t see the lumps for the forest.” Some people have substituted the word ‘trees’ for lumps but the original saying had ‘lumps’ in it. Don’t argue with me, we have 1000 words still to go. The grand scenics were, by far, the toughest shots to get for my book, The Nature of Vermont. I had the detail shots, the intimate landscapes and the semi-close images but landscapes with a distant horizon and a pretty foreground were a bear to get. It’s that darned forest. Vermont is called the Green Mountain State but it really should be called the Green Forest State. Now, don’t get me wrong, I love the northeastern forest. I am a forest junkie. But there are times when the forest is really just a pain in the neck. So I have resorted to hiking up mountains to find lookouts to get the shots I need. The problem with this approach is that it requires considerable physical effort on my part and I would rather simply skim the cream from the roadside than go through all the effort to churn the milk from the summit. Case in point. I have been waiting for two weeks for a clear, blue-sky day to chase some landscapes. With a trip fast approaching I settled for a less than beautiful day to climb Camels Hump Mountain. Camels Hump is the most well known and beloved mountain in Vermont. In fact, it is depicted on the Vermont quarter. I have to have a shot or two from Camels Hump for the book. Without a shot from the top of The Hump (as we call it) I would have all my flannel shirts confiscated and I would have to pretend New Hampshire is really the prettier state. Both of those things are nearly impossible for anyone who has lived in Vermont for any period of time. I don’t mind hiking. In fact I like hiking but hiking and climbing a mountain with a 40-pound pack are two different things. One is invigorating and the other is, well, just plain stupid. I chose stupid. Up I went leaving the trailhead in mid-afternoon to get to the top for the nice late afternoon light. Unfortunately, despite my considerable effort and my desperate need the light didn’t cooperate. This is not to say that I didn’t take any pictures. I hiked all the way up there, by god, I was going to take a shot or twelve. At the time I thought what I was getting was pretty good. I remember thinking, ‘the haze isn’t really that thick and the light isn’t really that dull.’ I also remember being pretty happy that under the circumstances the images I had gotten were really pretty darn good. I was even mildly surprised that I was able to get such good shots. Exertion is the Devil’s hand to clear thinking. When I got my three rolls back a few days later I saw what I really shot…..three rolls of dully-lit landscapes with awful white, hazy horizons. The only pictures that worked were a few compositions of a rare tundra wildflower that can be found in Vermont only above tree line. Of course, I already have three or four nice shots of this flower in bloom. Now I have five or six nice shots. So the only images I got after all that work were of exactly what I didn’t need. Wait, there is more irony to this story. Three days later the day I had been waiting for dawned bright and clear and magnificent. By noon I was prowling around the western flanks of The Hump looking once again for my elusive Vermont landscape. This time I was in my car, map in my lap, looking for a vantage point from which I could put the outline of Camels Hump in my composition. I drove every back road, every dirt lane; I even drove places I probably wasn’t supposed to drive. I drove near the mountain. I drove far from the mountain. I drove up other mountains. I drove along rivers, through valleys and into people’s driveways. The entire time the sky was clear, blue and magnificent. And the entire time I didn’t take a single shot. Not one. Nada. Zip.. Zilch. No lo compositiono. I got nothing. The problem was that there was always something I didn’t want between the mountain and me. Trees, power lines, ugly houses, forests, gravel pits, interstate highway, power lines, did I mention power lines? Not distant, hardly noticeable power lines but big, obvious, can’t avoid’em power lines. For four hours and over eighty miles I looked for landscapes and instead got bupkis. I have plenty of bupkis. I have plenty of petootie as well. I don’t need anymore petootie. I don’t need anymore bupkis. What I need are landscapes!!!!! I know that you have all figured out by now that I climbed the mountain on the wrong day. I would appreciate you not pointing that out to me. I did learn a few things. I got to know the area west of The Hump very well and found some other things to photograph
Writing

One of the most persistent questions I have been asked over my career is how to get published. My persistent answer has been- write. This is why. Magazines publish most of their photos as part of articles. While a photo essay used to be a fairly common magazine piece, photo essays (images without words) are increasingly uncommon to increasingly unheard of. So you have two choices to combine your images with words. One is to submit your pictures to a magazine’s cattle call for images and hope that your image is the one selected out of the thousand or more submitted. The other is to include words with your images. This is called a story. This gives you just about a 100% chance of getting your images published assuming the magazine likes your words. Therein lies the rub. Setting aside the submission process I will concentrate on the writing process, perhaps the most intimidating part of getting published and becoming a complete professional photographer. I have been doing it for so long that writing has become second nature to me but I realize this is not the case for most people. So let me break it down to the most effective, most unintimidating technique I can. Writing is the process of clearly and simply communicating with words. It is something we do everyday when we talk to our family or friends or colleagues. And yet when we try to put these words down on paper our brains go hair wire and clearly and simply become gobbledygook. This is because we get in our own way trying to make more out of something that usually needs less. So here is what to do- talk yourself a paragraph. Pretend you are having a conversation with a friend or family member and, with tape recorder in hand, describe your subject to them. Don’t get high and mighty, don’t use words you wouldn’t normally use and don’t get overly complicated. Just tell the person what you are doing as if you were on the phone with them. When you are done with the first paragraph, write down what you have taped. Then do the next paragraph into the tape recorder and so on. Soon enough you will have ‘written’ your piece. You are not done yet though. The real art and process of writing is the act of rewriting. Reread what you have written and clarify and simplify as needed. Then do it again. After a few times give it to someone else to read and see what he or she think. Is it clear? Do you get your points across simply? Is it easy to read? Does it say everything you want or need to say? I have rewritten this short piece four times so far and I expect I will go over it more yet. This is what usually happens at this point- people become overly critical of what they have written and become hyper sensitive to the point of either paralysis or nausea. This, of course, kills the entire process. I always find it interesting that we all acknowledge that practice is necessary to become good at almost everything except writing. We get a few paragraphs down, look at it once, realize it is not perfect and toss the sucker away like a Congressman tosses compromise into the trashcan. We must practice everything else we do in life but with writing it apparently should be just about perfect the first time. Well here is the news. It will be God-awful the first time, bad the next time through, simply dull on the third pass and actually not so horrible on the fourth. If you persist to the fifth time through you actually may like it. Oh, times two through four are also known as work, often hard, frustrating work and sometimes uncomfortable work. But if you persist your work will be rewarded. Remember- writing is the process of rewriting. Eventually, you won’t need a tape recorder to write you will just listen to your head and write down what you hear. And eventually, eventually what you hear you will really like. You will still need to rework the words and shuffle things around but it will become a joyful experience and not a dreaded one. This is called skill and with skill comes confidence. So for practice write a short how-to article on something you do well or do everyday. It could be how you cook an omelet or how you photograph bees. Or it might be how you suggest photographing at a local place you know well. Keep it simple, keep it clear and keep at it. Pretend you are describing it to me. I won’t bite, I won’t yell at you but if you are yourself and I get what you are trying to say I will look forward to what you write next. And isn’t that the point?
One Third of the Way to Nowhere!

Arrggghhh! It has happened again! I have read once more for the ten thousandth time it seems that the proper place to focus for a hyperfocal landscape is one third of the way into the picture! Oh really!?! Let’s us all think about this for a moment. A hyperfocal landscape is a composition that goes from very close to very far and it is all in focus. Typically it goes from a couple of feet from the camera (can be even closer) all the way to the far horizon or infinity in camera-speak. In order to do this you must use a wide angle lens, your smallest f-stop and you must pick a point of focus where the depth of field will cover everything from near to far. So far so good. Okay, so now the composition is all set up, the exposure is all figured out using f22 on a 24mm lens and you have to decide where to focus. If you focus too far into the composition the foreground will be blurry. If you focus too close, the background will be soft. We all have the tendency to focus too far away and our foregrounds go out of focus usually ruining the image. So how do you figure out where the proper focus is supposed to be? You DON’T focus a third of the way into the picture. What does that mean anyhow? If the farthest point in your picture is at infinity (which it will be for a hyperfocal landscape) then you should focus one third of the way to infinity. What is one third of infinity? What is one third of the way to infinity? It’s like asking what is one third of limitless or one third of eternity? Excuse me, I’m going to go one third of the way to forever. Pardon me, May I have one third of endless? Really!?! IT’S NONSENSE!!!!! IT CAN’T BE DONE!!!!! IT’S BBBAAAALLLLLLOOOOOOOONNNNEEEEEEEEEYYYYYYY!!!!!!! (I’ve taken a breath now) Here is the correct way to figure out where to focus for a hyperfocal landscape. The rule is that you should focus 2 to 3 times the distance of your closest point in your composition. If there is a flower that is 2 feet away from your camera then you should focus at 4 to 6 feet. If a rock is the closest thing in your composition and it is 3 feet away from your camera then you should focus 6 to 9 feet away (you can bracket your focus points- take several shots with focusing points at 6 feet, 7 feet and 8 feet say). When you do this you will initially feel that you are focusing much too close but you are going to have to trust me and just do it. Thirty years of taking a gazzillion hyperfocal landscapes tells me I’m right and every ‘third of the way’ idiot out there is a moron. Can I be any clearer? Baloney is bad for you and terrible for your photography. Don’t swallow it.
Teach a Workshop!

So I have been thinking about why professional photographers offer photography workshops. Beyond the obvious- “it pays” (some of the time) – there must be some other more powerful reasons. As this is my thirtieth year of teaching workshops I also wonder why I have been doing it for so long, what keeps me going? Teaching workshops is not a walk in the park as much as I walk in the park teaching workshops. (How’s that for a sentence?) The days are very long and there is lots of planning to do. Every year at every workshop location there are always changes to deal with: bridges get washed out, roads are suddenly closed for grading, trails are closed due to bears, public access become private property, the elk no longer show up, drought causes the wildflowers not to show up, fall color poops out, a sudden frost causes havoc, the meeting room is mistakenly booked, permits are suddenly required etc., etc., etc. There is a limitless set of problems that every workshop leader has to contend with often at the spur of the moment. This isn’t a big deal when I am out by myself but with a dozen people who have paid a goodly sum of money it kinda is. Why put up with the hassles when it is just easier to go out and shoot on your own? While these things aren’t a huge crisis they add considerable stress to a leader who is trying to provide the best photography and teaching for his or her participants. And lets not even talk about the weather. With the climate as screwy as it is now it is virtually impossible to plan or predict even 12 hours ahead. Planning to do a sunset on the third night? Need some clouds for some nice forest photography? Good luck! Better stay flexible and keep your car engines running. Of course there are the participants themselves. Gathering 12 or so random people who are as strange as photographers often are is roll of the dice. Some workshops really shine and there is a great communal energy during the time together. But some are struggles with disparate goals and experiences dividing rather than enhancing a group. Again, why deal with people at all? Just go out and take some pictures on your own. So if it is stressful, grueling, difficult and personally photographically unproductive what is the point? What is it that keeps me coming back for more? Well, you’ve gotta love to teach but it’s more than that. It’s you, silly! Odd for a confirmed curmudgeon to say but it is true, the participants of my workshops keep it fresh and invigorating for me and I profit far more from them then I do from any salary I earn. Almost all of my closest friends and a vast majority of my regular friends (I know, none of my friends are very regular) I have met on my workshops. These people have gone beyond being participants and have become an important part of my life. Unfortunately, they are spread all over the country but that’s okay- my community of friends is nationwide. This is why I don’t really care for doing short seminars. In a large group I am just an ugly face upfront and my audience is just a sea of nodding heads. I can give out information but I can’t personalize it and therefore my teaching effectiveness suffers. The money is good but the experience is poor. I’d rather have a good experience then have a pocketful of dough. There are some ancillary benefits of doing workshops as well. I get to see some amazing images every workshop I do and I don’t mean mine! Some of the images I see during critiques are simply astounding. I am humbled and inspired every workshop I teach by the creative vision of my students. The fact that I keep these images and add them into my files is an added bonus! The final reason I teach workshops is for my small but perfectly formed brain; if you want to really learn something try to teach it. The act of clearly explaining something forces you to deeply understand it. You want to keep up with what’s happening in photography? Try standing in front of 12 people and asking, “Anything else I can answer?” So there you have it. You are the reason why I still teach photography workshops. It’s your questions, unexpected comments, bizzarro techniques that I find endlessly surprising, and your pictures that keep me coming back for more. And you? What’s this got to do with you? You all know enough to teach a photography workshop perhaps not to a group of long-time practitioners but to plenty of others. Go out and offer a photography workshop to your church, or community center, to your friends or to a travel company in the area. Go to your local camera store or artist’s guild and offer one through them or go to a local school and try it there. You’ll be invigorated, a bit scared, inspired and wonderfully involved. Plus you’ll meet some wonderful people who may turn out to be great lifelong friends. The money is not important – do if for free at first, but just do it. You’ll love it. The four images included here were all taken by the participants of my Oregon Coast workshop.
A Bit of News
The Ten Rules to Ruining an Image
I had spotted him at the Crooked River overlook, a fellow photographer chasing a sunset. He had caught my eye as he cranked through shots, not at all paying attention to what he was doing. He was weathered and bent like an old oak snag and his face, a crush of wrinkles, showed only a faint smile. But he was a gentle man and when he spoke, his words were etched with wisdom. He said ” Anybody can capture a pretty scene but it takes talent to ruin one.” I figured he was just another hare-brained photo editor off his Prozac but he said he was the author of four books, each devoted to the art of mediocre photography. The first had been a great success- The Nature Photographer’s Complete Guide to Unprofessional Field Techniques. His second book was more specific- Screw-ups. His third book explored his philosophy of capturing the mediocre moment- Unfocus on Nature, and his fourth, Blandscapes, dealt with the bland scenic. His name…….John Flaw. The sunset was a screamer so he was disappointed and had time to talk. He gave me his ten rules to ruining an image- reproduced below- and then he quietly left. I later found out that he had died, bitter and unappreciated, from the drink…..a beer truck had flattened him…but his legacy lives on. Rule #1 Put as many bright and out of context objects on the edge of your viewfinder as you can. This creates distraction and pulls the away from the subject, diminishing its impact. My Response: Your eye is attracted to the brightest part within your composition. If the brightest spot is not part of your subject you have diluted its impact and created visual confusion. If the bright spot is on the edge of the frame your eye is pulled completely out of the composition! This is a particularly common problem with less than blue skies. These milky skies will always appear blank white on film. Crop out white skies as much as you can, completely if possible. Also, be aware of white sky sneaking through tree branches. Either zoom in to eliminate the treetops or move to a spot where the sky is blocked by vegetation. Rule #2 Take plenty of haphazard photos and never be patient or deliberate. Mindlessly bracketing exposures is a great way to waste your time. You’ll also end up with lots of so-so photos. Beware, sooner or later, if you take enough shots, you’re bound to get a good one despite yourself. My Response: Everything about the photographic process should be deliberate. You should be able to verbalize why you are using a particular lens and not another, why you are set up where you are, why your tripod is so high, why you are photographing this subject and not another, etc. This is the best reason to use a tripod- it slows you down and forces you to be deliberate. Once you have slowed down, there are times when it is as important to just stop and wait. The wind will eventually ease up and the light is always changing, it is up to you to be patient and wait for the best conditions before you take the picture. In the photo of the Fall aspens, the sky behind the aspens was not great. But I noticed a thunderstorm approaching and waited for the dark sky to be behind my composition. The shaft of light on the aspens was just luck but the chances of having good luck increase the longer you hang around. Rule #3 Photograph in full sun. Not only is harsh, direct light the most unappealing for nature subjects, the increased contrast will hide all those annoying details. My Response: Yikes! Sunny days are days to sort images, scout locations or go for a hike. Harsh, direct light is terrible for most outdoor photography. No camera can handle the enormous range in contrast on sunny days- either the shadows will be blocked-up black without detail or the highlights will be blazing white. This is why you should never photograph winter or in a forest on a sunny day- too much contrast. Also, many of the subjects that we photograph, like flowers, birds and leaves, are soft and delicate, they should be photographed in soft and delicate light. Full sunlight is just the opposite. Use a diffusing screen to soften the light- the closer the diffuser to the subject the more diffused the light. Or, cast your own shadow on the subject if you don’t have a diffuser. The poppies against the cactus were photographed at noon, under the blazing desert sun. I used my camera’s self-timer and ran around to cast my own shadow on the flowers to get the quality of light I wanted. Soft light for soft flowers. Rule #4 Never think or take control of any part of the photographic process. Today’s sophisticated cameras always know better and besides, you paid a lot of money to let the camera make all the decisions. My Response: Autofocus; autoexposure; autoknowbetter. Auto modes just make your mistakes for you automatically. Your camera’s auto modes are tools that are appropriate sometimes but never all of the time. Raise your hand if you think the new matrix metering modes can handle all exposure situations better than you can. Wrong! Figuring out proper exposure is no more difficult than getting yourself properly dressed in the morning. If you rely on autoexposure all the time you will miss capturing the magical light or the unusual circumstance that we all hope to photograph. If you rely on autofocus all the time you are more likely to bull’s-eye the subject within your composition (another John Flaw technique). Rule #5 For portraits and close-ups find the most distracting background you can. Nothing ruins a great subject like a terrible background. If you happen to come across a great subject with a perfect background just move the subject to a different background. My Response: Bad background, bad photo. It is as simple as that. It
Crank Flaw
I was out taking pictures in my old sugar woods when I looked up and saw a man walking toward me. He was about my age but worn and walking absentmindedly as if he didn’t have a clue where he was going. It was pretty clear he was a fellow photographer. There was something else though that told me he was a photographer. Perhaps it was his bewildered gaze. Or maybe it was his stumbling gait. Or maybe it was the fact that he was carrying a camera bag and holding a copy of my Photographer’s Guide to Vermont in his hand. I couldn’t quite place it but there was something about him that seemed very familiar. “Say, there’s something about you that seems very familiar” I said cunningly. “Could be the camera bag I’m carrying,” he muttered. “Could be but there just seems to be something else” I continued probingly. “Could be that I am carrying a copy of your Photographer’s Guide to Vermont,” he muttered again, keeping a safe distance. “Ah…..” I said cleverly “Or it could be the fact that I was in your workshop last week” “Um, gee, really?” I sputtered. “So, you must be a photographer” I said, recovering nicely. “Used to be a photographer. It gave me up.” “You mean you gave it up.” I said regaining my annoying correcting habits. “No, I meant what I said. It gave me up. Photography and photographers changed and I was left behind.” “Left behind?” I said, “What do you mean, left behind? If you’re not a photographer why are you still carrying around a camera bag?” “Listen, photography used to be about craftsmanship and technique, about getting the best picture you could in the field. It used to be about looking for the very best subject, picking the right angle for the very best background and waiting for the very best light to take the picture. Heck, photography used to be about capturing light. Now a days photography is more about taking anything in the field and then trying to fix it later in a computer. Seems like being a better photographer these days’ means buying ever-higher resolution, ever more mega pixels and ever faster processing. Gotta have more dots, more pixels, more auto focus points, more frames per second. Gotta have more. Gotta be faster. The catch is it never makes the photographer any better. It’s crazy and I don’t understand it but photography gear has better resolution then most photographers do. I am seeing lots of 12 meg gear in the hands of two meg shooters.” “12 meg gear for a two meg shooter, that’s very good. Were you born a curmudgeon or did you grow into it?” I said feeling a bit frisky. “My friends don’t call me Crank for nothing.” “Your name is Crank? What, your parents didn’t like you?” “Nope, born Crank Flaw, one of the six Flaw kids. Hank is a barber, Shank is a golfer, Tank repairs swimming pools, Stank is a movie critic and Frank is a retired meat inspector/photographer. ” “That’s some family,” I said. “But if you’re not taking pictures anymore, why are you carrying around that camera bag and a copy of my photographer’s guide?” “The camera bag is filled with photography techniques that should be forgotten and never used again. I carry it around to remind photographers of how not to do things, not that it does any good. Seems like what was once bad technique is all of a sudden just fine. How many times have you heard in a critique ‘Well, I can always fix that in Photoshop’?” “Well, ” I said, “I do hear that a lot, but what am I supposed to do?” “You can take this bag. It’s all yours now. It’s a one of a kind bag, made by Pandora Photographics, so be careful when you open it.” “Why me?” “You have curmudgeon potential and you can still, barely, tell the difference between what is sound technique and what is sloppy technique. What did you say in the workshop? Don’t be dumb and lazy. This is your very own dumb and lazy bag. It is yours now to carry around and share with people. Good luck, you’ll need it.” Crank came over and dropped the bag at my feet. Kneeling, I opened it up and started to root through it. Techniques started flying out. Some were pretty old and obsolete such as pulling film and smearing glop on filters but I also found lots of bad techniques and crazy things that photographers still do. He told me to share the bad things photographers do so here goes- my favorite bad techniques and crazy things photographers do as given to me by Mr. Crank Flaw: Crank thinks photographers believe too much in the power of the computer.I can’t disagree with this one, I have heard “I can always fix that later” too many times during a critique. There are certainly lots of things you can fix with any image processing program. You can crop, you can selectively lighten or darken, you can eliminate distractions, you can blend two shots together, etc., etc., etc.But there are things that you can’t do in a computer. You can’t create the effect of getting lower, what we used to call ‘bending your knees,’ to get a better shooting perspective. You can’t create the effect of a polarizing filter. You can’t mimic shooting in the rain and you especially can’t mimic sweet light. You can lessen bad light if you are clever but there is no substitute for great light.It is always better to take your time and do the best you can in the field rather than to be sloppy and lazy in the field and try to fix it later with the computer. Besides, my experience is that if you are sloppy and lazy in the field you will be just a sloppy and lazy when it comes to fixing it
Depth of Field — Part 2: The Grand Landscape
The other side of mastering depth of field is photographing the grand landscape. In part 1 I talked about photographing a portrait where you will need both the appropriate f-stop and subject. The correct f-stop will allow only your subject to be in focus and the correct subject will have enough distance between it and the background to allow an out of focus, poster board, background. When you are photographing a landscape chances are that you will want the entire picture to be in focus. The extreme circumstance of this is when you are using a wide-angle lens and your composition goes from a foreground clump of flowers 18″ away to a mountain range at infinity focus. The question I am always asked on my workshops is where do you focus when do a shot like this? If you focus too far away your foreground will be blurry but if you focus too closely your background will be blurry. In the old days we used to call this hyperfocusing. Hyperfocusing is a technique of maximising your focus so that your image will have the greatest depth of field for whatever f-stop used. When you hyperfocus you are picking a point of focus which will allow the depth of field to reach both the closest and farthest points in your composition. This is not an easy thing to do and it is nearly impossible to estimate without some aid. Used to be a time when camera lens actually had very useful little hyperfocusing scales on them that were accurate, easy to use and very handy. Not wanting to make photography too user friendly most lens makers did away with these little scales leaving us a bit high and dry. Then little charts started to appear that listed every possible f-stop and distance combination and then apparently told you where to set your focus. The problems with these charts is that I never really figured them out, I never had them with me when I needed them and I never had a tape measure with me to measure my composition. Then some cameras came out with a depth of field program that automatically set the focus properly. My problem with these is that first I don’t trust them and second I don’t trust them. Remember: autoexposure, autofocus, oughtoknowbetter! So what is a photographer to do? There are two, low-tech techniques. The first one assumes that a majority of the time when you are thinking about hyperfocusing you are using a wide-angle lens (typically between 20mm and 35mm), you are using your smallest f-stop (usually f-22 or f32), the closest point in your composition is less than 3’ away and your camera is angled down. (You may not be angling your camera down to do your grand, sweeping landscapes but you should be. When you do so you draw in the foreground and make your composition much more compelling and inviting.) When this is the case simply focus in the center of your viewfinder. That point will almost always be 4′ to 6′ away from you. I could make this more difficult but it really is that easy- focus in the center of your viewfinder. If for some reason you are not doing your sweeping landscapes with a wide-angle lens, small f-stops, interesting foregrounds and downward angled cameras you need to avoid wide open spaces or not take your camera with you anytime it is light out. Sorry, you needed to know. If you want to be sure of this focus point or if you are distrustful of really easy, helpful techniques you can double check your focusing point by multiplying the distance to the closest point in your composition by two or three. This is John Shaw’s technique. If the closest point of his shot is 2′ away he will focus 4′ to 6′ away. He then fine-tunes the focus by using his depth of field preview button. When you do this you will notice that you have focused in the center of your viewfinder. There you have it, two easy ways to solve your hyperfocusing problems. Now return your tape measure to your junk drawer and put all those silly cards away with all those other silly photography cards you have accumulated over the years and go out and take some pictures.
Depth of Field — Part 1: The Grand Portrait
Depth of field is one of the foundation concepts in photography and yet it is one that many of my students still don’t quite understand. Well, they think they understand it and they mostly do but the practical implications of using depth of field are almost universally poorly executed. Everybody knows that depth of field refers to the amount of the final image that is in focus. To simplify, a shallow depth of field means that there is very little of the final image that is in focus; a lot of depth of field means most of the image is in focus. Everybody also knows that the physical size of the aperture -the f-stop- determines the resulting depth of field. A small-numbered f-stop – f2.8 or f4.0- means a large aperture and very little depth of field. A large-numbered f-stop –f16 or f22- means a small aperture and a lot of depth of field. This is the basic stuff. Once you understand the seemingly reversed relationship that a small aperture equals a large amount of your image will be in focus and that a large aperture equals a small amount of your image will be in focus you pretty much understand the basics of depth of field. Ah, but there is more! Understanding the concept and putting it to use are two different things. The f-stop you choose is not the sole determinate of how much of your image will be in focus. The other key component that effects the final appearance is the distance the subject is from the background. This is especially true when doing any kind of portraiture be it of a flower, an elk or a grandchild. If the background is too close it will always be annoyingly in focus no matter what f-stop you use. I see this all the time while doing critiques in the workshops I teach. Someone will show an image of a portrait they tried to do. They wanted a nice sharp subject and a completely out of focus background (what is known as a poster board background). Almost always either the subject is fine but the background is not out of focus enough or the background is wonderfully out of focus but the subject is not in focus enough. Ideally, you want either everything in your image to be in focus or just your subject in focus and everything else way out of focus. If something obvious is not quite in focus it will likely be a major distraction. This is because the mind tries to resolve slightly blurry things thus making it distracting. If something is way out of focus the mind accepts it as unable to be resolved and ignores it. So what is one to do? In order to get a beautiful poster board background for your wildlife, wildflower or wild-child portrait the f-stop you choose is not nearly as important as the subject you choose or the angle you choose to shoot that subject. Both of those things will determine how far away the background is going to be from your subject. Assuming you have both pretty light and a pretty subject if you want a dynamic portrait let the background be your guide as to both what and where to photograph. How do you do this? Put your hands in your pockets and spend a little extra time looking for the best subject to photograph. There may be lots of pretty flowers in the field or elk grazing in the meadow but only a couple will have a good background. If you are photographing a person just place the person in a place where the background will enhance and not detract from the shot. If you can’t move your subject then pick an angle to shoot with the best background. A big part of becoming an accomplished photographer is always being aware of the background. It is as simple as that.